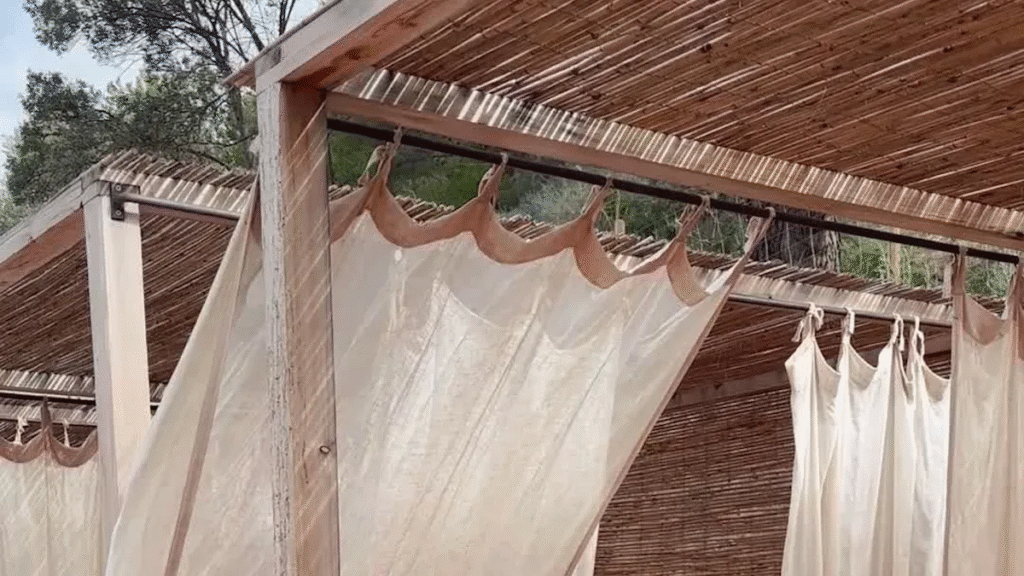
You can easily install shade nets to protect your plants and enhance your garden’s environment. These sunshade nets help shield delicate leaves from harsh sunlight und reduce heat stress. They conserve soil moisture, block strong winds, and even provide some pest protection. Installing sunshade nets creates a healthier, more resilient garden.
Wichtigste Erkenntnisse
- Measure your garden area carefully and choose the right shade net type to match your plants’ needs for better growth.
- Set up strong supports and attach the shade net tightly using clips or ropes to protect plants from sun, wind, and pests.
- Maintain your shade net regularly by checking for damage and cleaning it to ensure long-lasting protection and a healthier garden.
Prepare to Install Shade Nets
Measure the Area
Start by preparing your garden site. Remove debris and smooth the edges where you plan to install shade nets. Use a tape measure to determine the length and width of the area you want to cover. Always measure from the inside edges of your mounting points. Draw a simple diagram and label each corner with its measurements. This step helps you keep track and ensures accuracy. Leave a few extra inches on each side when cutting your net to allow for secure attachment and tensioning. Consider the sun’s movement throughout the day so you can position the net for maximum protection.
Tipp: Take multiple measurements if your garden bed is not a perfect rectangle. This ensures the net fits well and covers all plants.
Choose Materials
You need several basic tools and materials to install shade nets. Most are easy to find at garden centers or online:
- Shade net or cloth
- Shade cloth clips or snap clamps
- Ropes or bungee cords
- Zip ties
- Scissors
- Support structures (hoops, poles, or frames)
- Sandbags (optional for extra stability)
Flexible garden hoops, such as EMT conduit or fiberglass rods, work well for supporting nets. Space hoops every couple of feet to create a sturdy frame. Use soft ties or clips to secure the netting tightly and prevent sagging.
Select Shade Net Type
Choose your shade net based on plant needs, durability, and local climate. The table below compares popular support materials:
| Material Typ | Durability & Lifespan | Upfront Cost | Annual Cost Efficiency |
|---|---|---|---|
| Metal Mesh & Aluminum | 10+ years, weather-resistant | Hoch | Very High |
| HDPE/Polypropylene | 3–10 years, UV resistant | Moderate | Hoch |
| Fabric/Canvas | 1–3 years, less durable | Niedrig | Moderate |
Select the right shade percentage for your crops. For example, tomatoes thrive under 10%-30% shade, while lettuce and spinach need 80%-90%. Refer to the chart below for more recommendations:
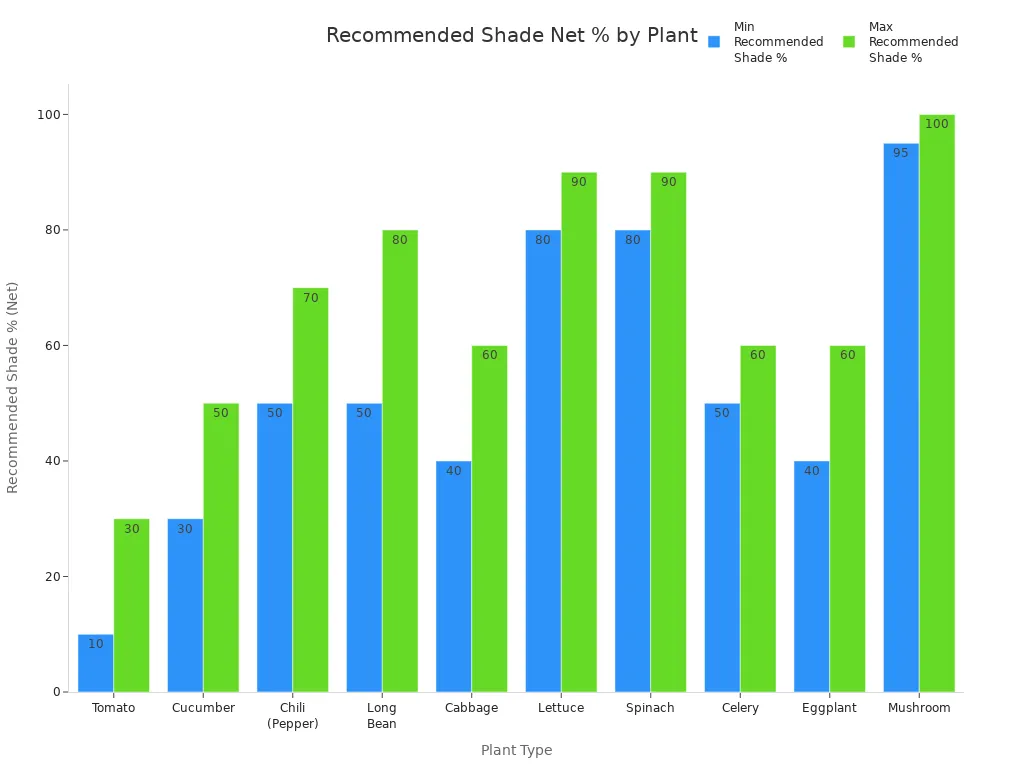
When you install shade nets that match your plants’ needs, you help them grow stronger and healthier.
Install Shade Nets
Set Up Supports
Begin by preparing stable support structures for your shade net. Select poles, stakes, or frames that match the size and shape of your garden area. Use metal, wood, or PVC, ensuring each support stands upright and remains firmly anchored in the ground. Space the supports evenly to distribute the weight of the net and withstand wind.
Follow these steps for safe and effective setup:
- Mark the corners and edges of the area you want to cover.
- Drive stakes or posts into the ground at each marked point. Use a mallet or post driver for stability.
- Check that each support stands straight and does not wobble.
- If you use a frame, assemble it according to the manufacturer’s instructions, making sure all joints are tight.
- Inspect all supports before moving to the next step.
Safety Tip: Always wear gloves and eye protection when handling tools or driving stakes. Double-check that supports are stable to prevent accidents during and after installation.
Attach the Net
Once you have set up the supports, lay the shade net over the area. Center the net so it covers all plants and extends slightly beyond the edges for secure fastening. Choose an attachment method that suits your support structure and local weather conditions.
Here are the most effective ways to attach the net:
- Use specialized clips or windbreak clips to fasten the net to the supports. Start at one end and work across, keeping the net taut but not overstretched.
- Secure the edges with zip ties, bungee cords, or soft UV-resistant rope at regular intervals. Distribute the fasteners evenly to prevent sagging.
- For extra durability, reinforce the net’s edges with grommets or hemmed borders. Lace a double-braided marine-grade rope through the grommets in a trampoline-style pattern. This method spreads tension evenly and protects the net from wind damage.
- Avoid anchoring only at the corners or using stiff materials that do not flex. These mistakes concentrate stress and can cause tears.
Anmerkung: Rope lacing offers the best longevity and stability for your shade net. Zip ties and bungee cords are quick but may degrade faster in sunlight or allow too much movement.
Secure and Adjust
Proper tension and coverage are essential for effective shade and long-lasting performance. After you attach the net, check for sagging or loose spots. Pull the net gently to create even tension across the entire surface.
- Trim any excess netting along the edges for a neat finish. If you use a knitted net, you can cut it to size without worrying about fraying. For woven nets, seal or hem the edges to prevent unraveling.
- Overlap sections if your net does not cover the whole area in one piece. Secure the overlap with additional clips or rope.
- Inspect all fasteners and supports. Tighten or adjust as needed to keep the net stable, especially before windy weather.
Tipp: Routine inspections help you catch problems early. After storms or strong winds, check the net and supports for any signs of loosening or damage.
Maintenance Tips
Regular maintenance extends the life of your shade net and keeps your garden protected. Schedule inspections every two to four weeks, or more often in harsh weather. Look for tears, rips, or signs of UV damage such as brittleness or fading. Patch small holes promptly with repair kits. Replace damaged sections or hardware immediately to maintain full coverage.
Follow these cleaning and care practices:
- Remove leaves, branches, and debris from the net surface to prevent sagging and damage.
- Clean the net with a gentle spray from a hose. For stubborn dirt, use mild detergent and a soft-bristled brush. Rinse thoroughly and let the net air dry before reinstalling.
- Avoid harsh chemicals or high-pressure washing, which can weaken the material.
- Store the net in a dry, cool place during the off-season.
High-quality shade nets, especially those made from UV-stabilized HDPE, can last 3 to 10 years with proper care. Consistent maintenance helps you avoid common problems such as sagging, tearing, or early material failure. When you install shade nets correctly and maintain them well, you create a stable microclimate that improves plant health, conserves water, and supports sustainable gardening.
You can install shade nets in your garden with simple steps and basic tools. Regular maintenance brings lasting benefits:
- Shade nets protect plants from heat, pests, and wind.
- You improve soil health, boost yields, and save water.
- Many gardeners notice healthier plants and lower costs.
Take action today for a cooler, more productive garden.